Writing workshop instructions with Hugo and deploying in OpenShift
This is the third part of my series covering how to Write workshop instructions with Hugo. In this article, we will deploy our Hugo mini-training as a container in OpenShift.
Since Hugo is a static website generator, we only need a web server in our container to serve those pages. Let’s settle for nginx that is neatly packaged as a container image, as part of the Software Collections.
And to build our final container image that will contain both our website (the static pages to serve) and the web server itself, we will use the Source-to-image (S2I) tool. Hopefully, the nginx image of the Software Collections is already S2I enabled!
Install the Source-to-Image tool
The S2I tool comes as package for Fedora or RHEL distributions, named source-to-image. On RHEL, you will have to enable the rhel-server-rhscl-7-rpms channel before.
On a RHEL system, use:
sudo yum-config-manager --enable rhel-server-rhscl-7-rpms
sudo yum install source-to-image
On a Fedora system, use:
sudo dnf install source-to-image
On MacOS, use:
brew install source-to-image
You can confirm the S2I tool is installed by running:
$ s2i version
s2i v1.1.6
Pull the nginx container image
If you are a Red Hat customer, you should be able to use the Red Hat official images:
docker pull registry.access.redhat.com/rhscl/nginx-114-rhel7:latest
Or if you prefer, you can use the image provided by the community:
docker pull centos/nginx-114-centos7:latest
Customize the S2I assemble script
The off-the-shelf nginx container image comes with standard S2I scripts that takes a GIT repository of static files and publish them as-is. We need to customize those scripts to call Hugo to generates the static files and replace the content of the GIT repository with those static files.
Hopefully, S2I comes with a nice mechanism to override the standard scripts. We only need to place our scripts in a .s2i/bin/ directory in our GIT repository. There are two standard scripts: assemble (to build the container image) and run to start the process from the container image. We will override the assemble script.
Create a .s2i/bin/assemble file in your GIT repository with the following content:
#!/bin/bash

# Exit on any error
set -e

hugo_version=${HUGO_VERSION:-0.54.0}
hugo_bin_name=${HUGO_BIN_NAME:-hugo_${hugo_version}_Linux-64bit.tar.gz}
hugo_bin_url=${HUGO_BIN_URL:-https://github.com/gohugoio/hugo/releases/download/v${hugo_version}/${hugo_bin_name}}

# Download Hugo
curl -s -o "/tmp/${hugo_bin_name}" -L  "${hugo_bin_url}"

# Install Hugo
tar -C /tmp -xf "/tmp/${hugo_bin_name}" hugo

# Build the website
mv /tmp/src/ /tmp/git
/tmp/hugo -s /tmp/git
ln -s /tmp/git/public /tmp/src

# Call the default S2I assemble script
exec /usr/libexec/s2i/assemble
Make it executable:
chmod 755 .s2i/bin/assemble
Check that your customized assemble script is working by running the s2i build command:
s2i build -c . centos/nginx-114-centos7:latest hugo-mini-training
The -c switch is mandatory here to use our local copy of the GIT repository since it contains changes not yet committed.
If you want the Red Hat official image, adjust the s2i build command to replace centos/nginx-114-centos7:latest with registry.access.redhat.com/rhscl/nginx-114-rhel7:latest.
You should see the typical Hugo output as part of the build logs:
Building sites …
| EN
+------------------+----+
Pages            | 22
Paginator pages  |  0
Non-page files   |  0
Static files     | 77
Processed images |  0
Aliases          |  0
Sitemaps         |  1
Cleaned          |  0

Total in 36 ms
---> Installing application source
---> Copying nginx start-hook scripts...
Build completed successfully
Commit and push your changes:
git add .s2i/bin/assemble
git commit -m 'add s2i support'
git push
Deploy on OpenShift
Once your repository contains the customized S2I script, you can deploy your website on OpenShift using the standard S2I mechanisms.
oc new-app centos/nginx-114-centos7:latest~https://github.com/nmasse-itix/hugo-workshop.git --name=hugo-workshop
If you want the Red Hat official image, adjust the previous command to replace centos/nginx-114-centos7:latest with registry.access.redhat.com/rhscl/nginx-114-rhel7:latest. Also, do not forget to change the URL to point to your GIT repository instead!
By default, the custom assemble script will build your website with Hugo 0.54.0 (latest version when this post was written) but you can use the version of your choice by setting the HUGO_VERSION accordingly.
For instance, you can downgrade to Hugo 0.53 with:
oc set env bc/hugo-workshop HUGO_VERSION=0.53
Continous Deployment
Part of the hype around Hugo is due to the level of automation you can achieve and especially Continous Deployment. This means the writer pushes his changes to a GIT repository and the website is rebuilt and deployed immediately, in an automated manner. The good news is that you can achieve this very easily with OpenShift!
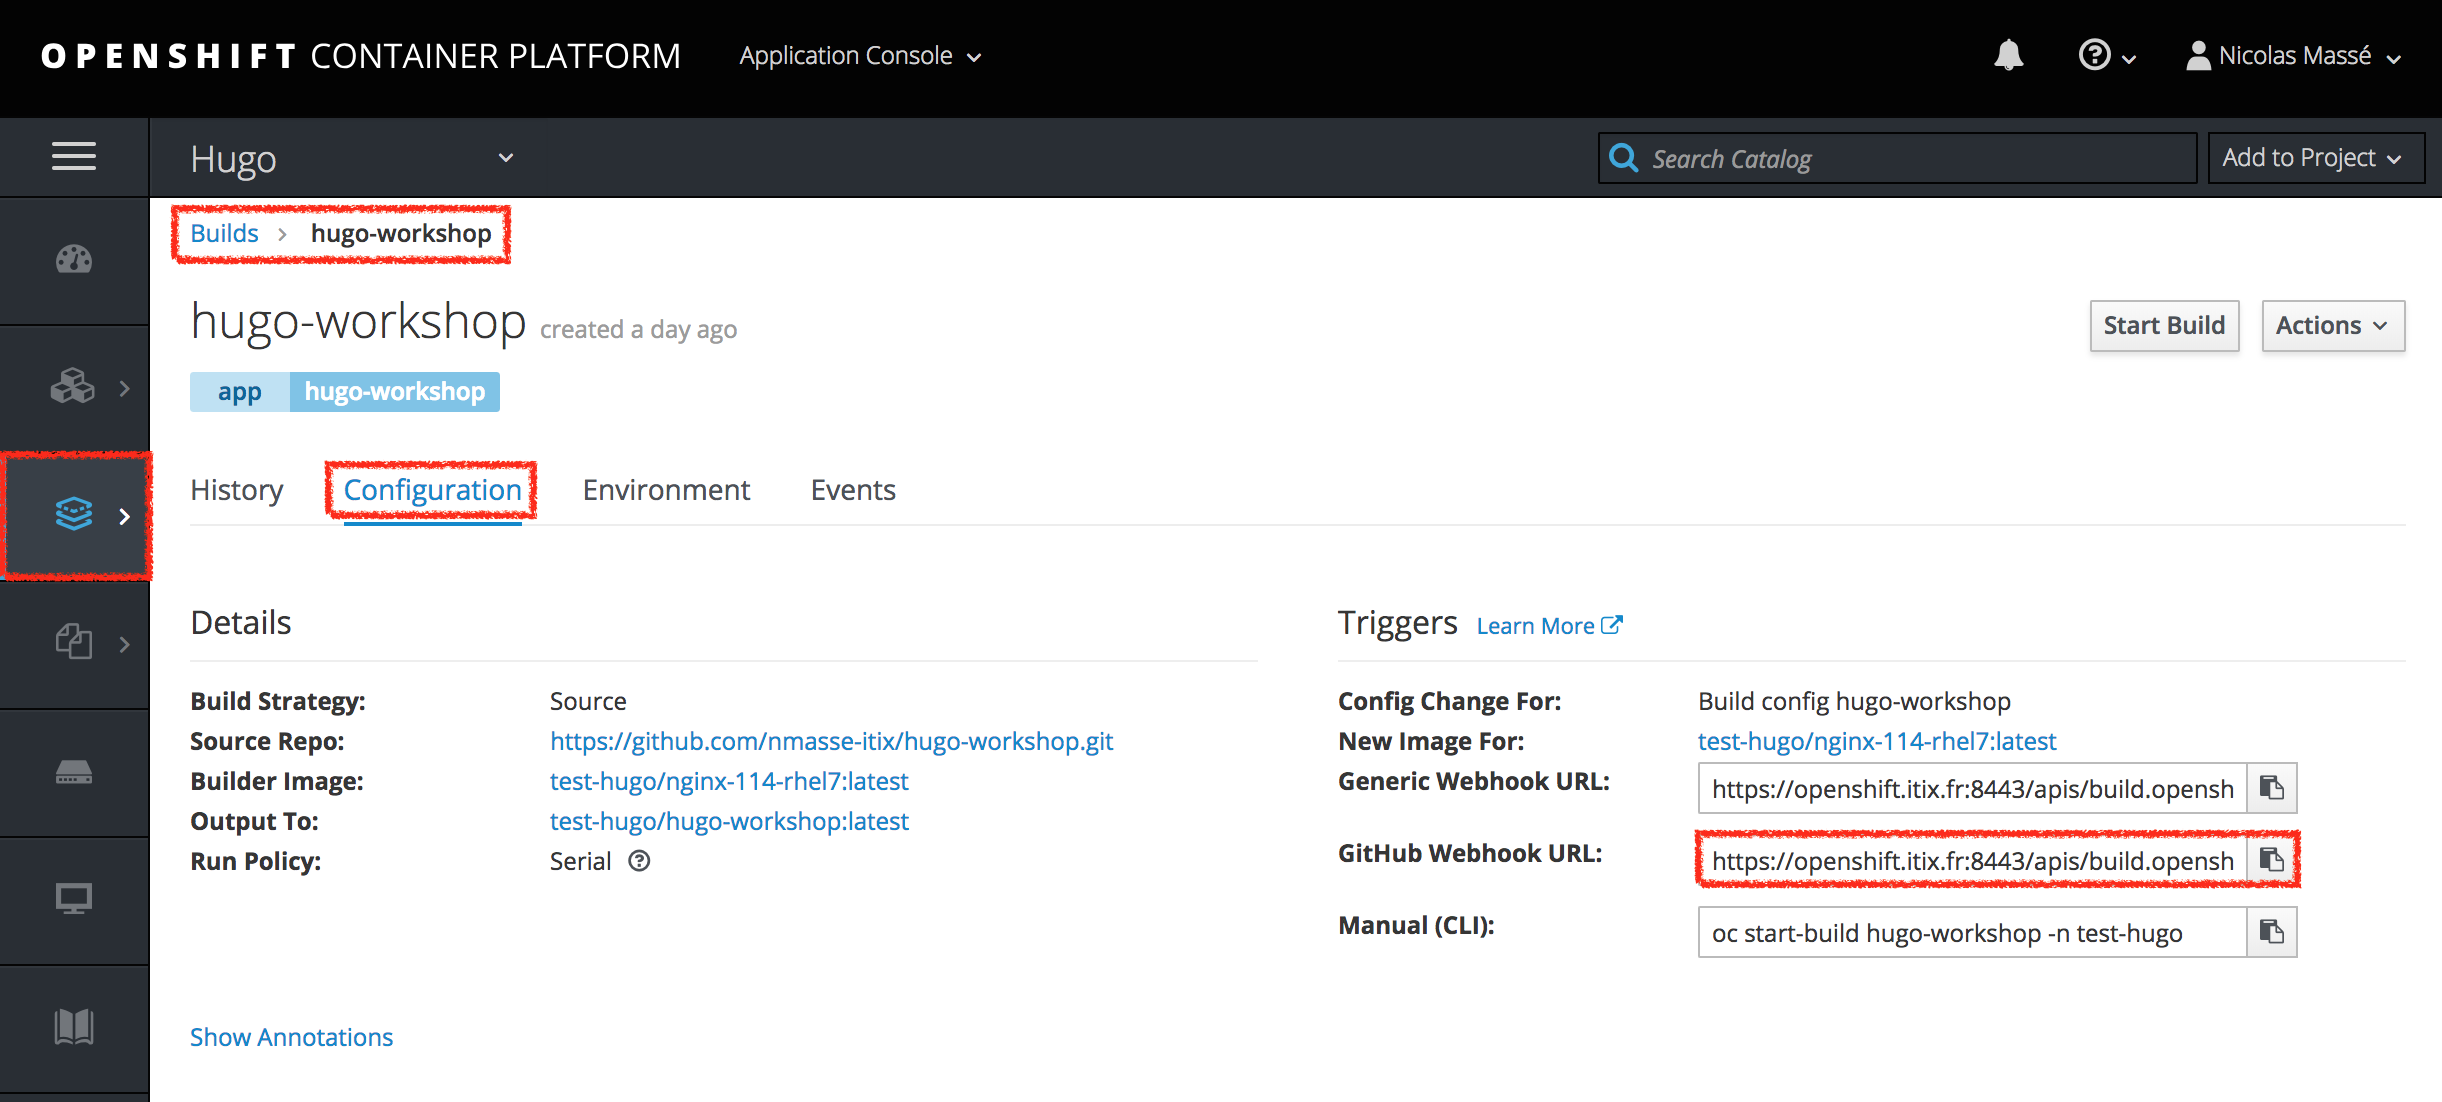
First, get the GitHub Webhook URL of your BuildConfig:
- Connect to your OpenShift Web Console
- Go to Builds > Builds
- Click on your BuildConfig (
hugo-workshopin the example) - Open the Configuration tab
- Copy the GitHub Webhook URL
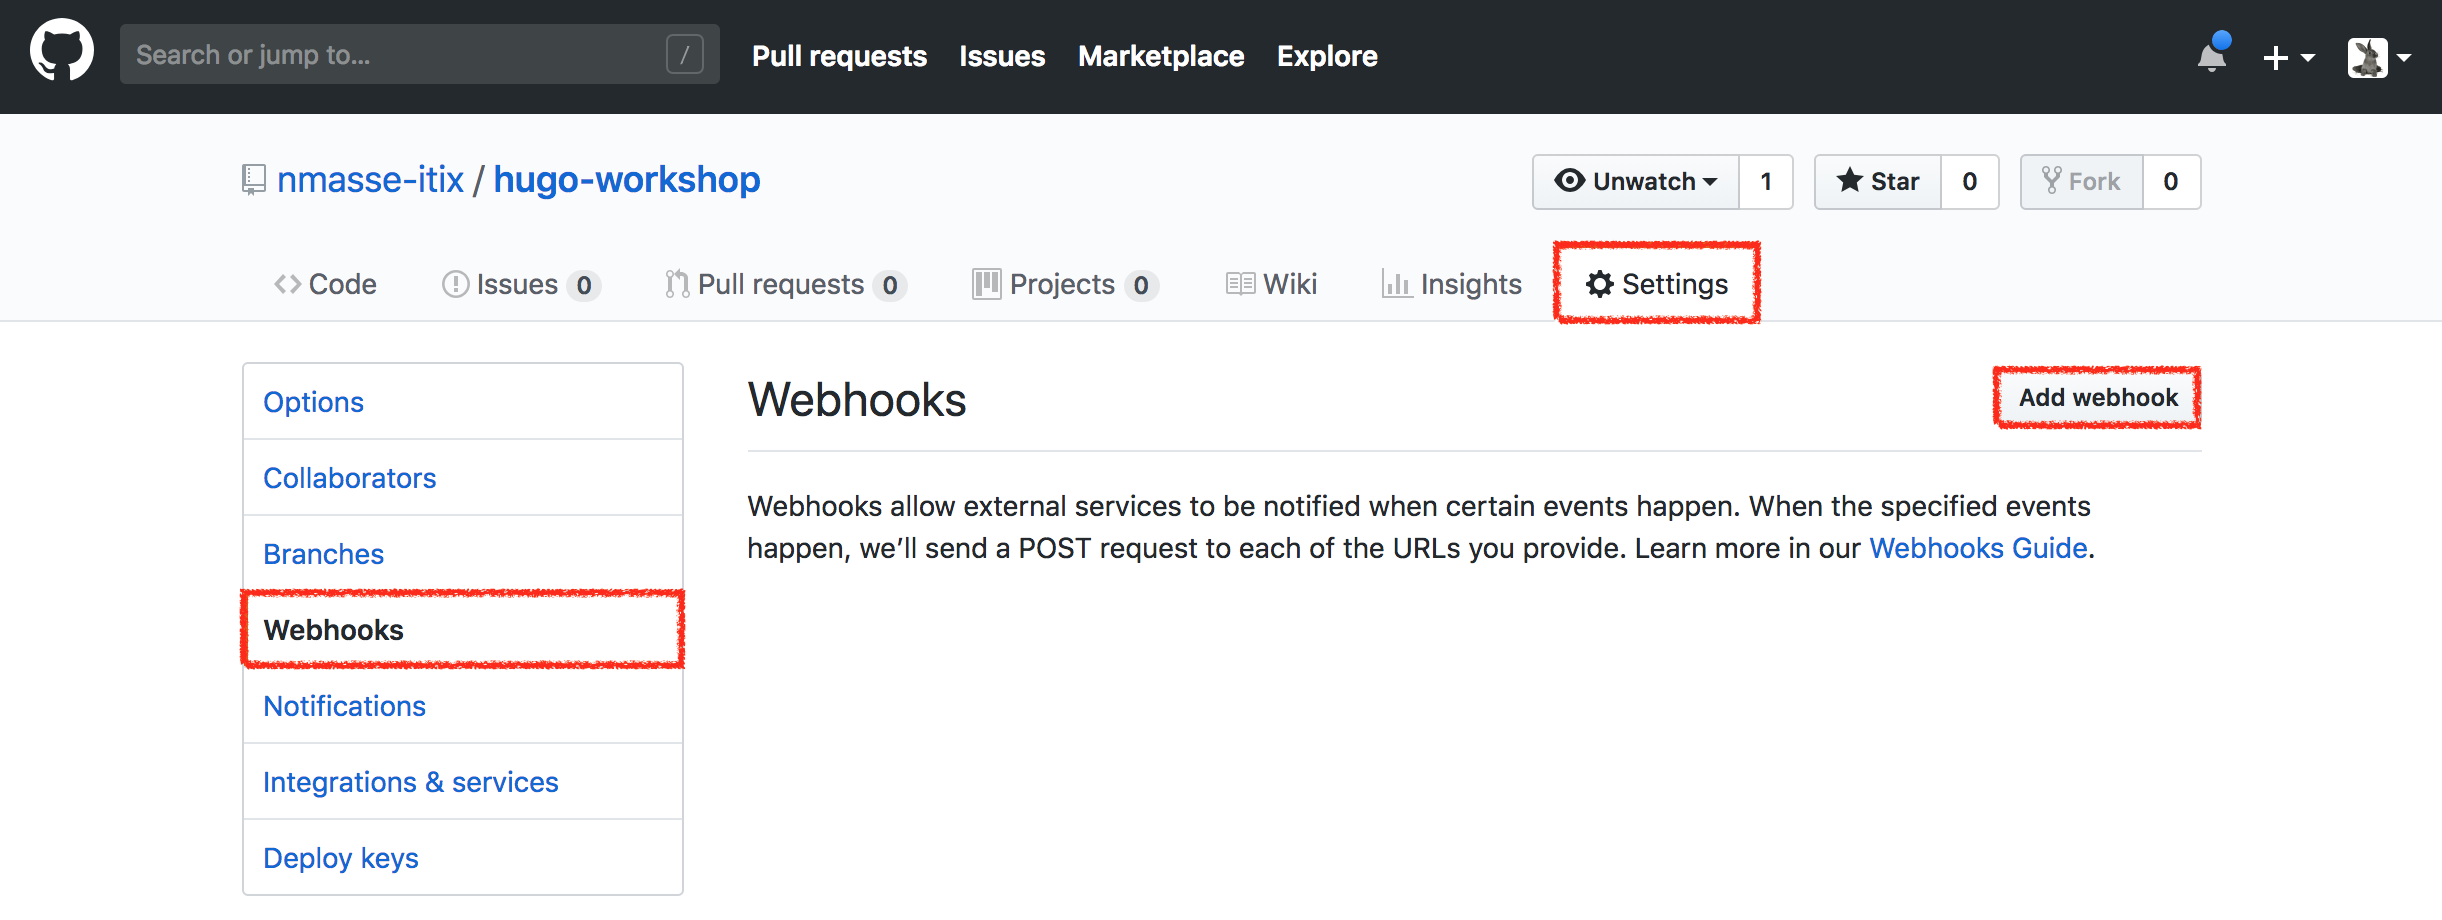
Then, go on your GitHub repository and add a webhook:
- Go to Settings > Webhooks
- Click Add webhook
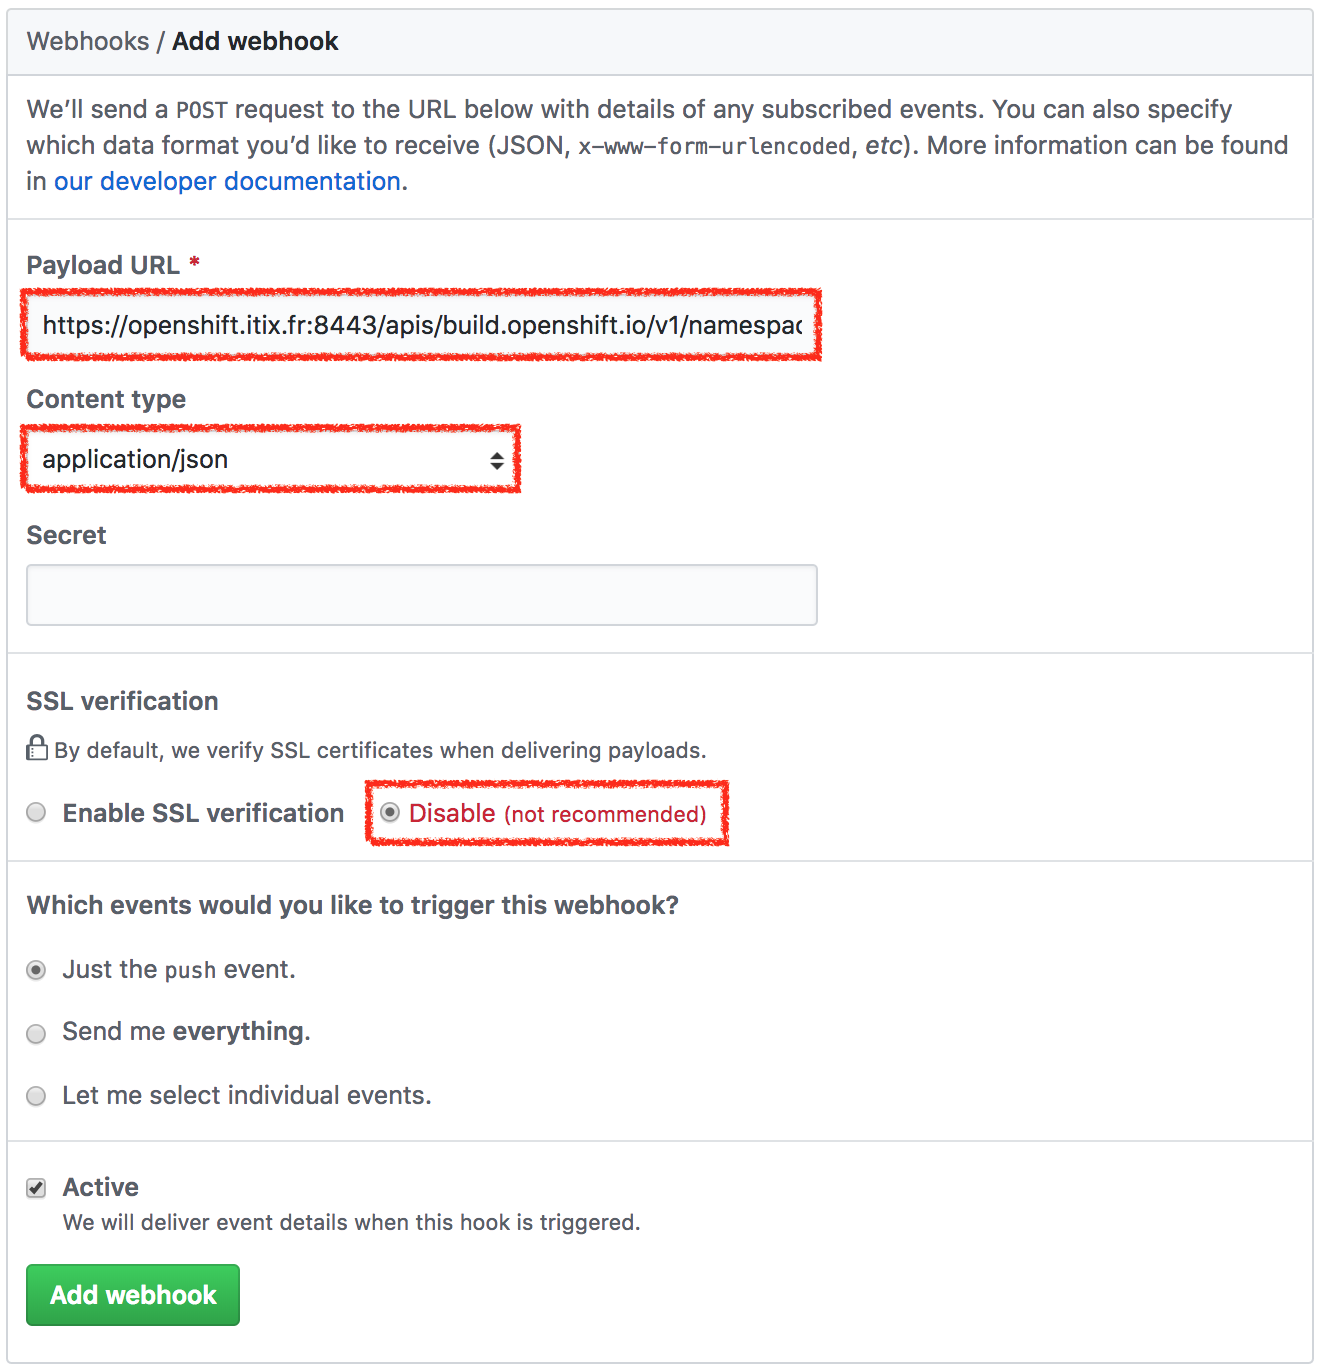
- Paste your Webhook URL in the Payload URL field
- Select
application/jsonin the Content type dropdown list - Check Disable in the SSL verification section if your OpenShift console has a self-signed certificate
- Click Add webhook
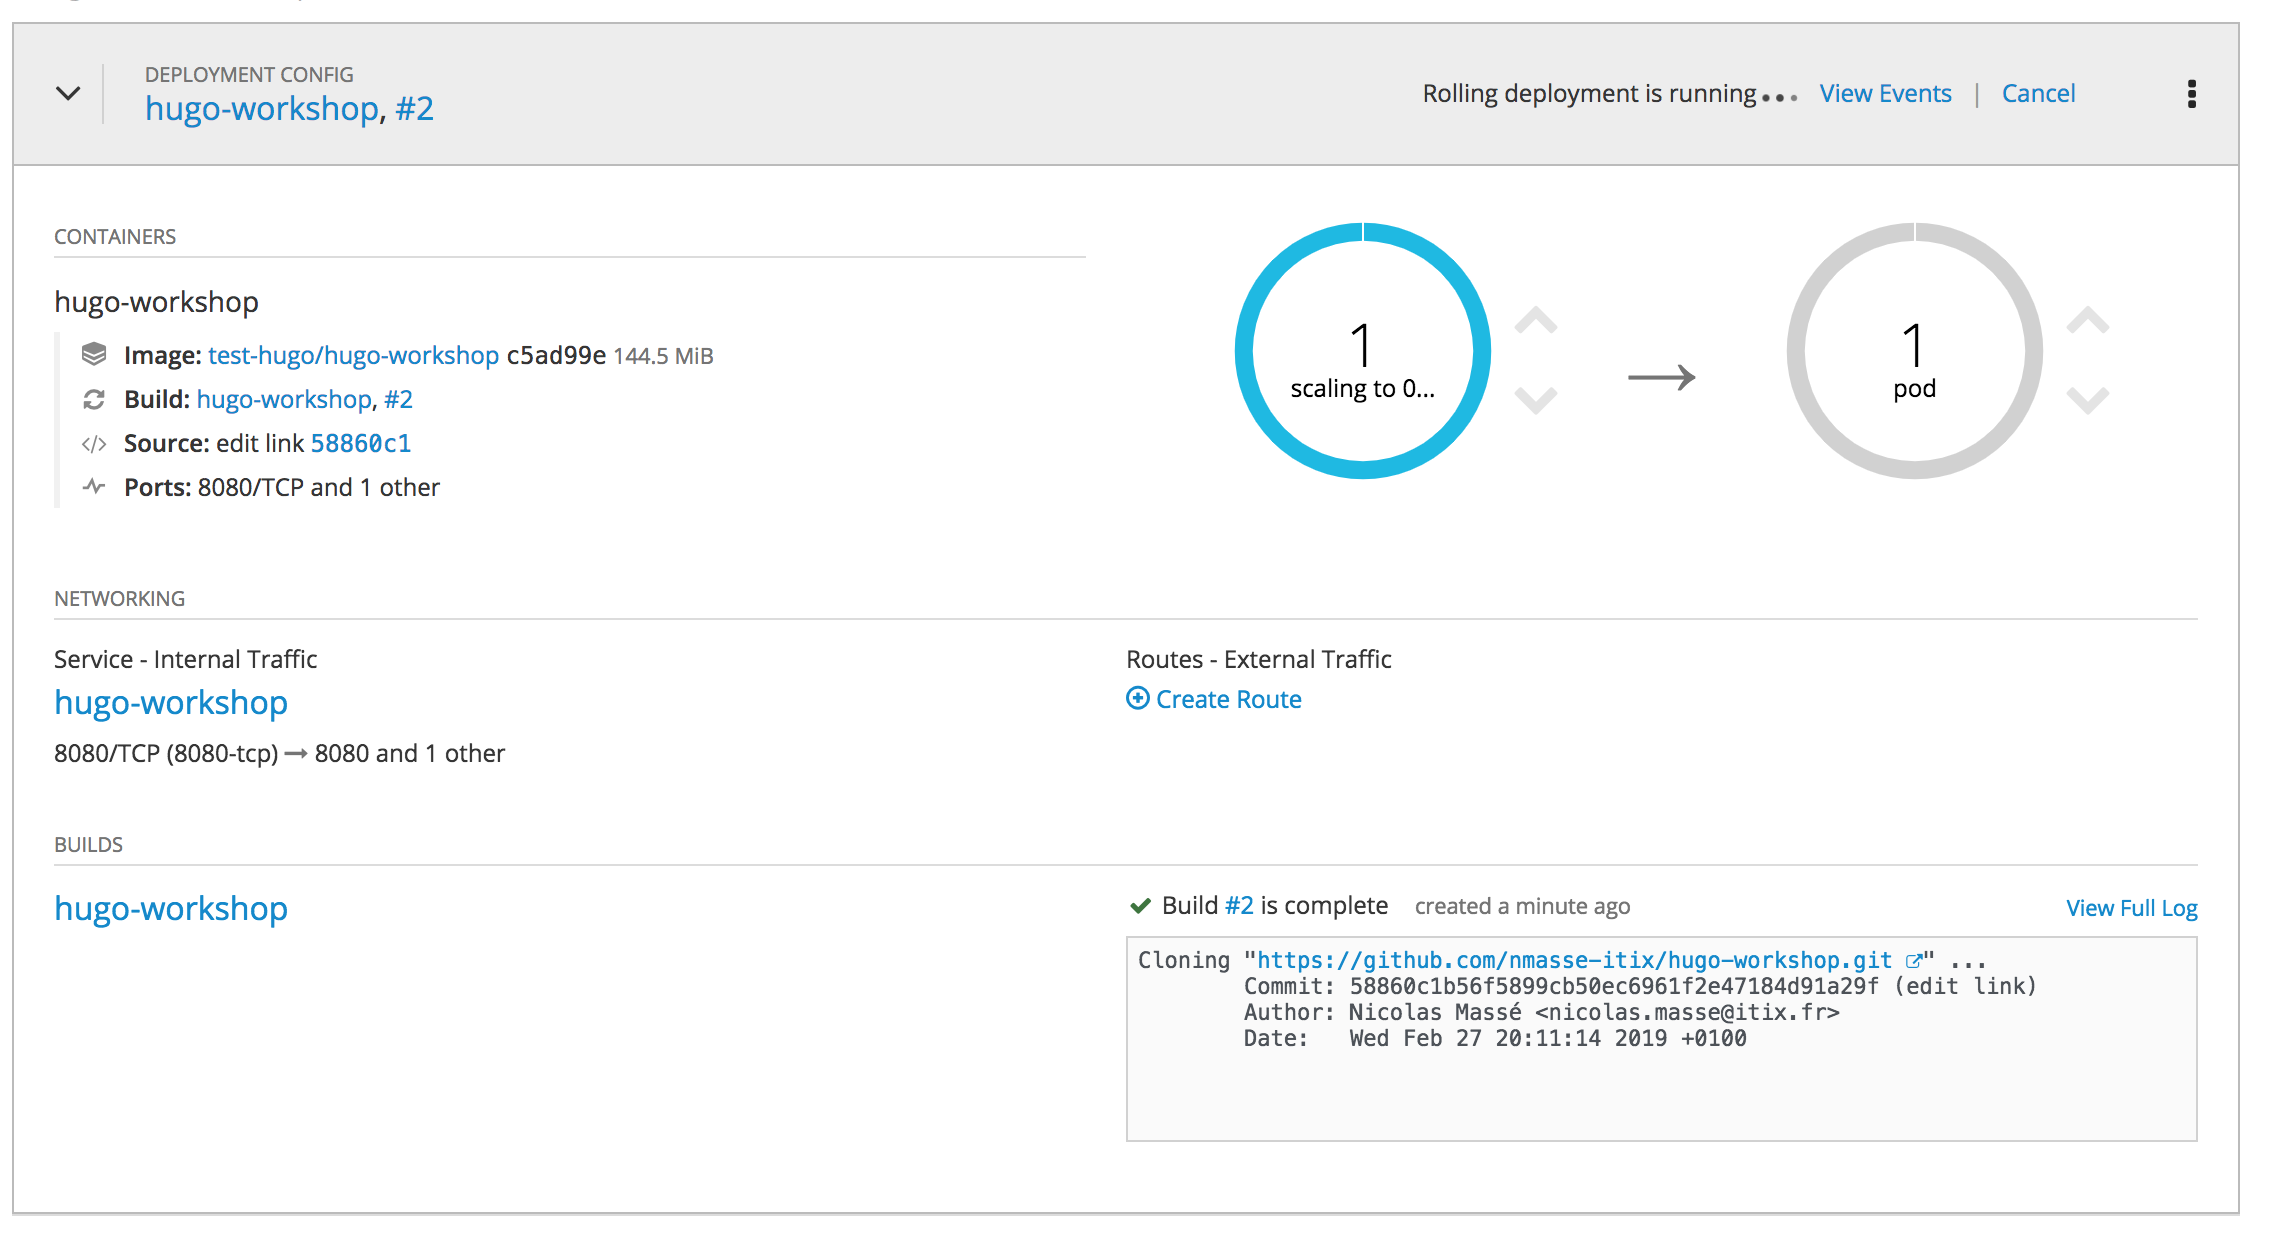
Try to push some changes to your GitHub repository and see OpenShift rebuilding and deploying your website!
Conclusion
In this article we presented a way to deploy a Hugo website as a container in OpenShift and achieve Continuous Deployment. Stay tuned for the next part of this serie!