Writing workshop instructions with Hugo
In my professional life, I often have to lead workshops with customers or partners. During those workshops, participants expect to be trained on a piece of technology or software.
I usually have to provision everything needed to deliver this training and write the training instructions. Those instructions are organized as a step-by-step guide with screenshots, text, verbatim sections, links, files to downloads, etc.
And maybe more important, those instructions have to be well organized, each step has to be clearly stated, identified and formatted. The progression needs to be logic and easy. At any time, the participant needs to know where he is, which steps he has completed and which steps remain.
And for the trainer, it has to be easy to maintain and collaborative.
Crafting support materials that can meet all those requirements is challenging. Slide decks could fit the participants needs but are very difficult to maintain for the trainer. Markdown documentation in a GIT repository are better for suited for maintenance and collaboration but is difficult to work with for the participants.
Hopefully Hugo can help us!
As an example, in the rest of this article, we will craft a mini-training about Hugo!
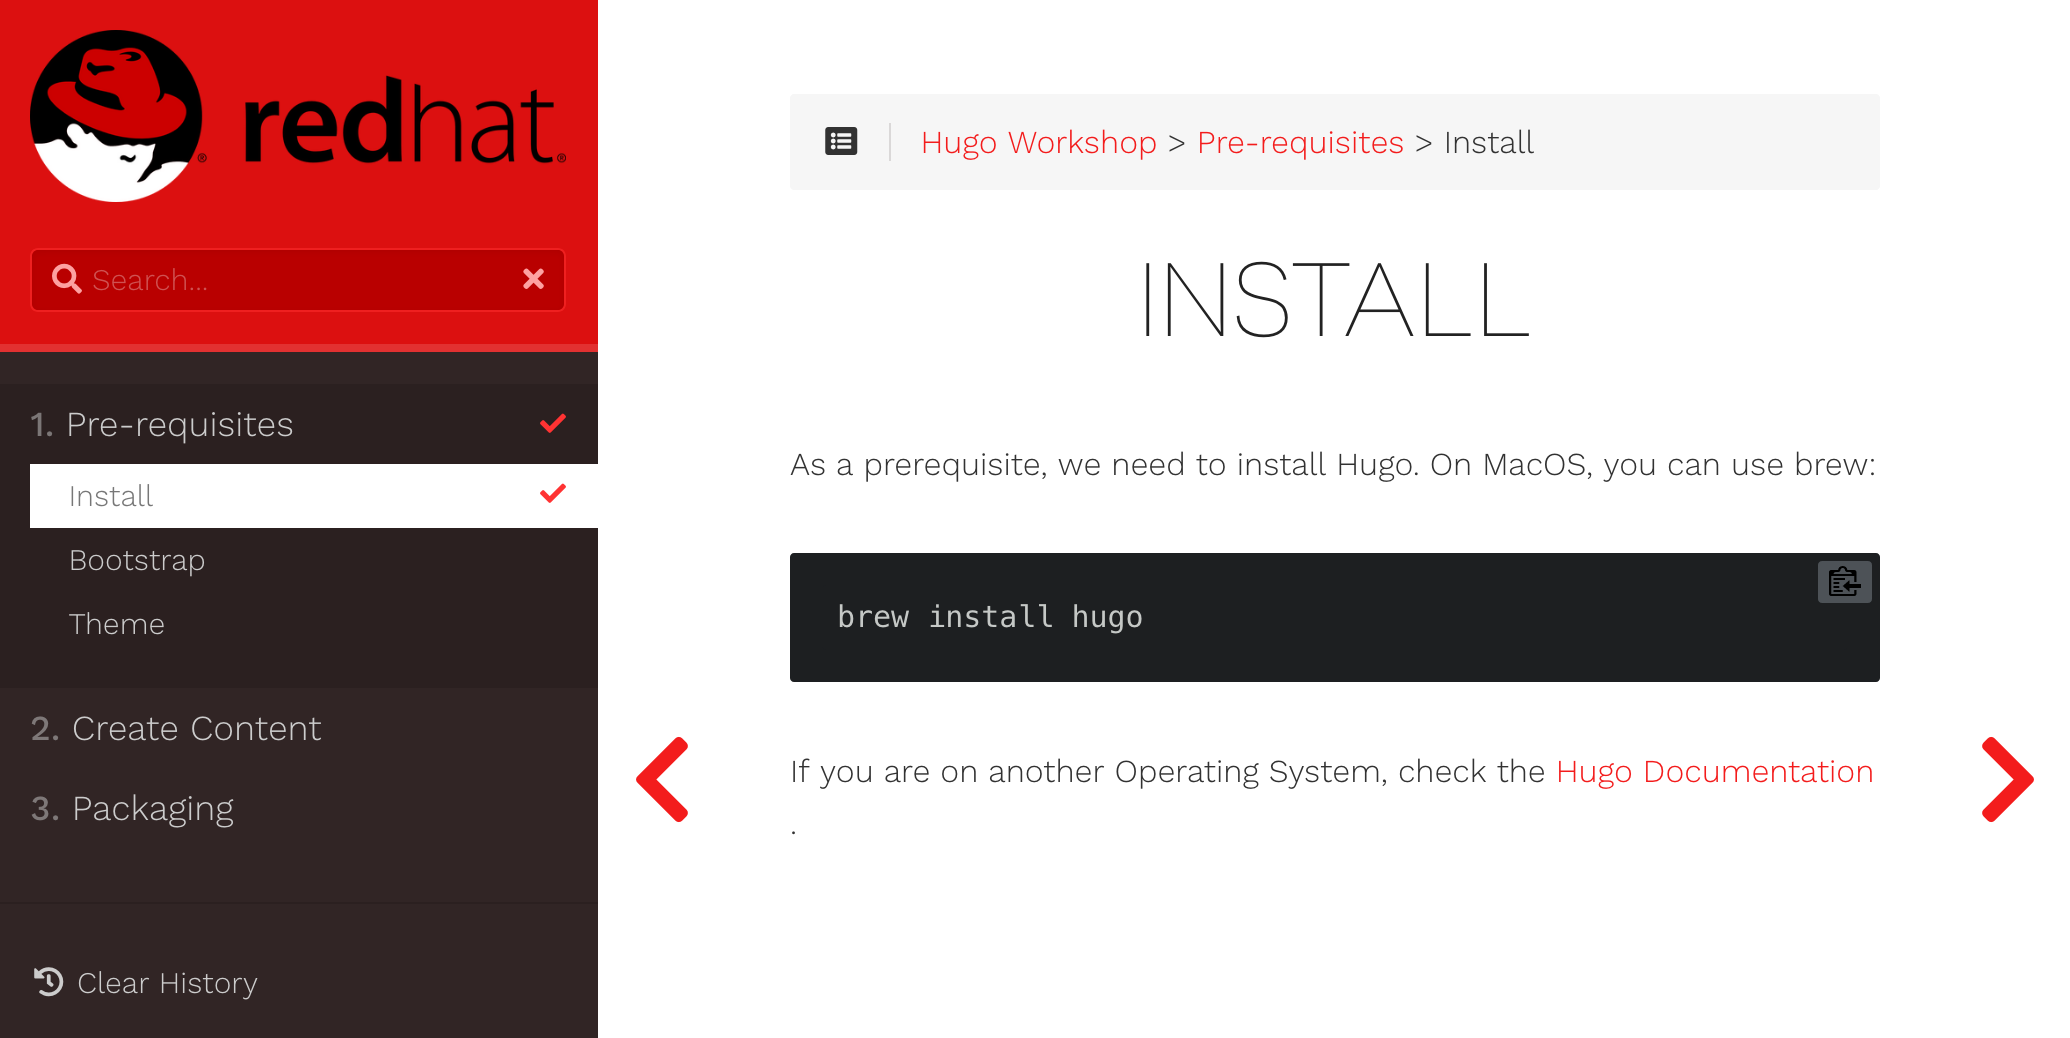
Installation
As a prerequisite, we need to install Hugo. On MacOS, you can use brew:
brew install hugo
If you are on another Operating System, check the Hugo Documentation.
Bootstrap a site
Bootstrap a Hugo site to hold the documentation of our mini-training.
hugo new site hugo-workshop
Add a theme to your site
The learn theme for Hugo is one of the most suited design for training instructions. It features breadcrumb, navigation buttons, table of content in the sidebar, checkmark to know which sections the participant visited and much more!
Install the learn theme:
cd hugo-workshop
git init
git submodule add https://github.com/matcornic/hugo-theme-learn.git themes/learn
echo 'theme = "learn"' >> config.toml
Generate content
Use the built-in Hugo archetypes to generate your documentation structure:
hugo new _index.md
hugo new pre-requisites/_index.md --kind chapter
hugo new pre-requisites/install.md
hugo new pre-requisites/bootstrap.md
hugo new pre-requisites/theme.md
hugo new create-content/_index.md --kind chapter
hugo new create-content/chapter.md
hugo new create-content/section.md
hugo new packaging/_index.md --kind chapter
hugo new packaging/look-and-feel.md
hugo new packaging/test-locally.md
hugo new packaging/git-commit.md
The _index.md is the home page for your mini-training. Let’s settle for
something short:
---
title: "Hugo Workshop"
---

# Welcome to my Hugo Workshop

Welcome! Please have a seat and relax.
The pre-requisites/_index.md, content/_index.md and packaging/_index.md
are the first page of each chapter. You will usually use them to introduce the
subject or the use case you will implement.
For instance, the pre-requisites/_index.md might look like:
+++
title = "Pre-requisites"
weight = 1
chapter = true
pre = "<b>1. </b>"
+++

### Chapter 1

# Pre-requisites

This section will help you complete all the pre-requisites. Let's start with
the installation!
Section files are regular Hugo content. The Table of Content on the left side
is ordered using the weight attribute in the header of each file (both for
chapters and sections).
You can inspect those files from my GIT repository.
Customize the look and feel
Edit the config.toml to match the following content:
baseURL = "/"
languageCode = "en-us"
theme = "learn"

[outputs]
home = [ "HTML", "RSS", "JSON"]

[params]
showVisitedLinks = true
disableBreadcrumb = false
disableNextPrev = false
themeVariant = "red"
This will enable cool features such as the search engine, the navigation, the breadcrumb and the checkmarks next in the table of content for visited links.
And, the left sidebar is now red!
Customize the logo and favicon with cool branding:
mkdir -p static/images/
curl https://upload.wikimedia.org/wikipedia/fr/c/cb/Red_hat_logo.png -o static/images/logo.png
mkdir -p layouts/partials
echo '<img src="/images/logo.png" />' > layouts/partials/logo.html
curl "https://www.redhat.com/profiles/rh/themes/redhatdotcom/favicon.ico" -o static/images/favicon.png
Test locally
You can test locally your new website by running:
hugo server -D
In your web browser you can now open localhost:1313 and admire your work!
Commit your work
By committing your work in a GIT repository, you will be able to collaborate with your peers for reviews and contributions.
Commit your work:
git add .
git commit -m 'initial version'
And push it on your GitHub account:
git remote add origin git@github.com:nmasse-itix/hugo-workshop.git
git push -u origin master
Next steps
Congratulations! You now have your training instructions neatly organised and clearly presented. Maintenance and collaboration have been greatly simplified!
In this first part of the series, we presented a very light introduction to Hugo and its application to workshop instructions. Be sure to read part 2: Writing workshop instructions with Hugo, with variables in your content to discover advanced usages.